
Welcome to our new fort/clubhouse! It's been a bit of a wait for all the little details to be wrapped up but we can finally put the "finished" stamp on this amazing project. Let's take a tour, shall we?

First you've got to climb up the ladder. Love the hand holds on the sides - don't know how "I" would get up otherwise, but they are a huge help to the kids, especially our smaller neighbor friends.

This handle which everyone uses to haul themselves up onto the deck is actually a handle from a boat we used to have. Works just as well here. ❈

We went with a cable railing. The fort is surrounded by trees on three sides and we thought having it be as open as possible would help keep the treehouse feel.

This photo is converging terribly, but you get the idea.. cute little spring loaded door. I'm 5'5 and I don't have to duck at all to go in, but my husband who is 5'11 does. I'd say it's just the right size. The door and windows are all screened. While there are still cracks and tiny open spaces they do keep the flies, bees, and cotton wood fluff out.

Stepping inside there are three nifty pop-out hooks for hanging extra sweaters (or Nerf ammo bags). The hooks close up flat when not in use (Ikea).

The fort's interior floor space is 6 ft. x 7 ft. and has just enough room to hold as many kids as want to be in there. It's not as big as it looks - but it's big enough! I'll do my best to give you a good picture of the layout.
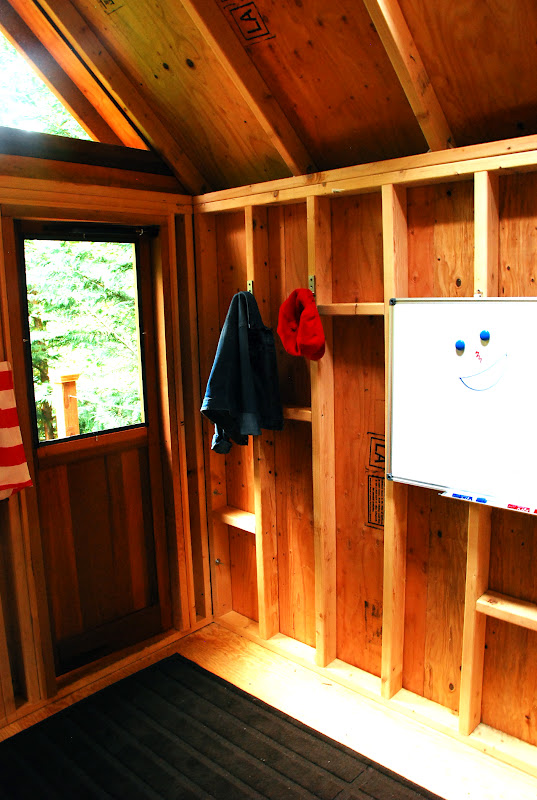
We used a brown rug on the floor because the kids like to take their shoes off (well trained!) in the fort and we try to avoid slivers around here. It doesn't fit exactly but it does the trick. The wall to the left as you walk in has some hooks and a white board.

The framing was left open so the kids could use it as shelving for treasures, radios, Nerf goods, etc. Also, we wanted to make sure kids were getting home on time - or knew if it was almost dinner time - and well, it just plain looks cute to have a clock in there.


Along the right wall we installed two fold down tables and four stools (Ikea). I was so excited to find these as they are easy to pop in and out. Great space savers!

Here you can see the fold out bracing...
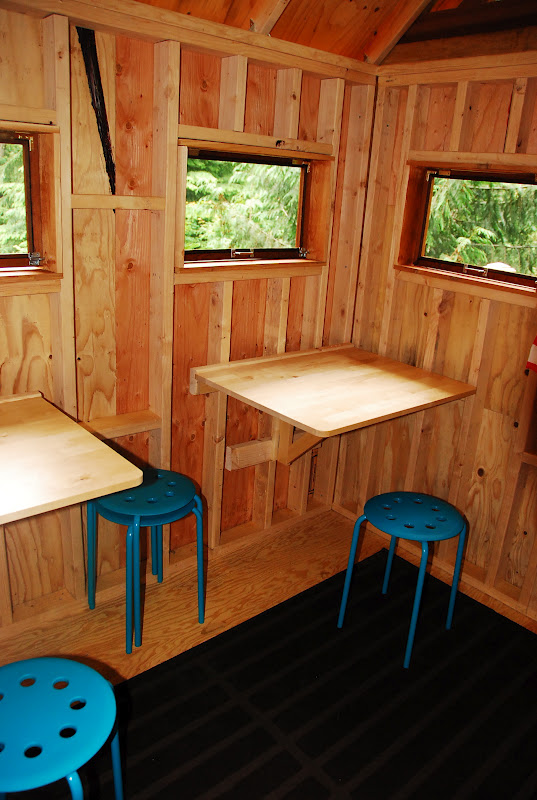
And here's how they look both open....

And here we are, back at the front door again!

I wanted to do planter baskets outside of the windows because we can see the fort from the deck. I wanted it to "blend in" as much as possible! My daughter was game, but my son didn't want flowers anywhere near the fort. He had a brilliant idea though and we were able to compromise by using big juicy strawberry plants. I think it worked out beautifully. ❈

So, there it is. Finished. A very special thanks to my husband who not only built this for his kids, but also for me. It's the fort I always dreamed they would have, and he made it happen. Thanks babe!
(This part 5 of a five part series, to see part 4 click here.)
Jen.....I love it :) What an amazing place to create memories for years to come. We have a treehouse....but in no way is it as cool as this one. Although the twins were using a paper towel roll and string to talk to one another from the top to the ground :) Thanks for sharing!
ReplyDeleteblessings,
karianne
Oh this makes me what to be a kid again. How fun! You guys did an amazing job on this. You and your kids will make so many wonderful memories here.
ReplyDeleteHi Jen,
ReplyDeleteOh my goodness, this is AMAZING!! The kids are going to have a ball this summer. What precious memories they will make and their friends, too! Your photos are wonderful, you truly have an eye for photography! It would be so fun to sit out on the deck with a glass of cold lemonade and watch the kids play. Enjoy and thanks for sharing!
Have a wonderful weekend! xo ~Liz
how lucky are your kids?!
ReplyDelete